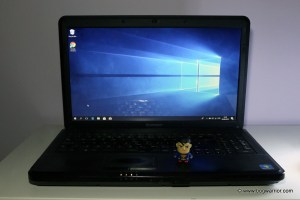
Having previously converted an old Windows laptop to Linux, I’m now going to turn my hand to another OS. Again, I’m using a spare laptop, this time one that’s about 10 years old and is creaking under the weight of trying to run Windows 10. And so, I’m going to have a go at turning it into a Chromebook. Neverware, the people who have made this experiment possible, have a checker where you can see if your laptop is supported (click here) Happily, my laptop has made the cut so on to the next stage.
What you’ll need
A compatible laptop (obviously). Before you start, check to see if it’s a 32 or 64-bit machine.
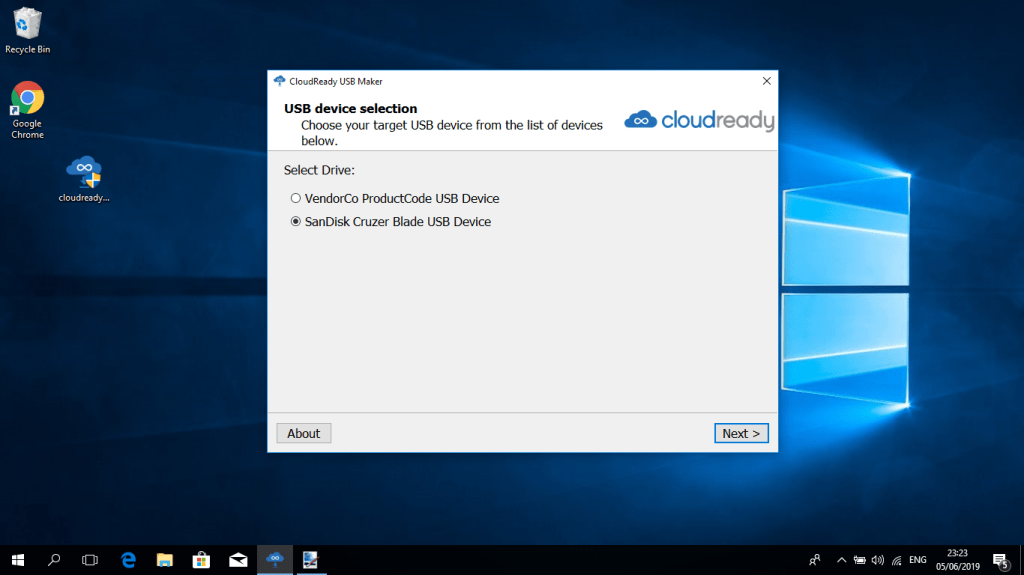
Insert the empty USB stick into any computer or laptop. (This stage of the process moves along more quickly when you use a faster computer)
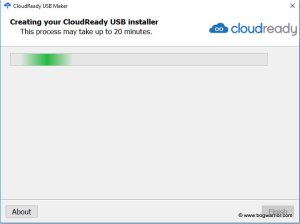
Run the CloudReady USB Maker program and select which type of operating system you want.
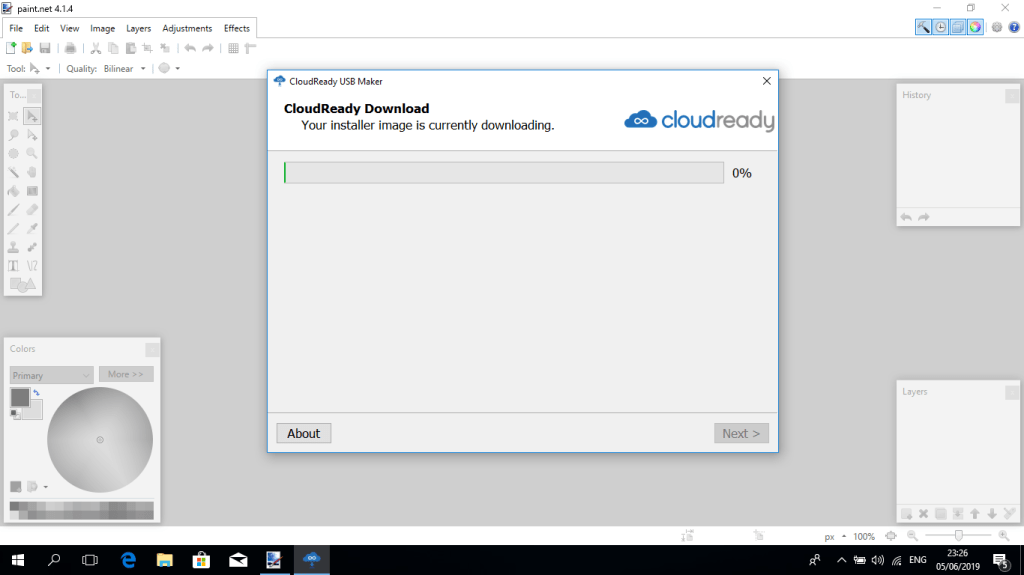
Wait while the installer automatically downloads, extracts, and creates the CloudReady USB Installer. This can take a while.
When it’s done, insert the USB drive into the “guinea pig” computer.
Reboot the computer, making sure that when it comes back up it shall be booting from the USB drive. This is usually done by pressing F9 or F12, depending on the computer manufacturer.
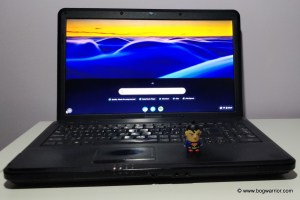
CloudReady’s version of Chrome OS will soon load up. It’ll ask you for your WiFi password and Google ID. The latter isn’t compulsory – you can look around without one At this point, you haven’t installed anything so if you think Chrome OS is the spawn of Satan you can still back out
If on the other hand, you’d like to install Chrome OS, click on the clock/wi-fi symbol in the bottom right-hand corner of the screen.
First impressions
Chrome OS definitely made this old laptop run more smoothly. Web pages loaded up more quickly and everything was nice and nippy.
Chrome OS isn’t for everybody but if you just want a computer for internet and and watching videos, it’s perfect.
It’s a good way to give an old laptop a new lease of life
Now that Chromebooks can access Google’s Play Store, the array of apps and games which can be run on it have increased.
Here is a slideshow of the process, should you still be interested…
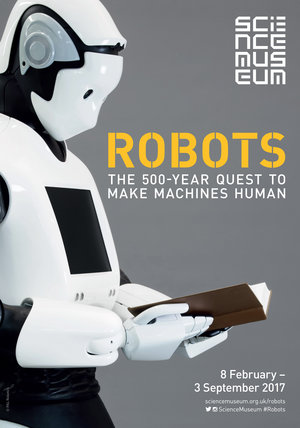
While in London for the Pink Floyd: Their Mortal Remains, I spotted a sign for a Robots exhibition in the nearby Science Museum. I knew nothing about the exhibition but, to paraphrase the line from Jerry Maguire, they had me at “Robots”.
Admission into the Science Museum in London is free and indeed, there’s loads to see for the price of zero pence. Some exhibitions have an entry fee and this one was one of those. Still, it was about robots, the poster was pretty cool and my head was well turned.
Maillardet’s automaton, taking a break from writing
As the exhibition poster says, Robots is the 500-year quest to make machines human. The first part of the exhibition had quite a few historical automatons, including a praying 16th-century monk and a draftsman from the beginning of the 19th century. There were also artificial limbs, tiny automatons which resembled insects, and even one that was part of a drinking game. I later learned that another historical automaton I’d love to have seen – the Silver Swan – had been in the exhibition until early April. Once it went back “oop north”, it was replaced by the little draftsman/writer created around 1800. When it was unearthed in 1928, nobody knew for sure who had created it and where it had been. That is, until they got the automaton working again and it started to write some pre-programmed poetry. Right at the end of its last poem, it scribbled ‘Ecrit par L’Automate de Maillardet’ (written by Maillardet’s automaton)
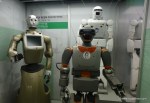
The next part of the exhibition brought us on to more recent times. It was hard not to miss the replica of “Maria”, the iconic robot from Fritz Lang’s 1927 film “Metropolis”. The original costume (which had been worn by an actress) had long since disappeared. It was also nice to get up close and personal with a T-800 from Terminator Salvation and not die horribly. There were some interesting stories attached to other robots on display in this section. Perhaps the most endearing was George the Robot, created by a young RAF officer from discarded aeroplane parts. Another British robot was beside George, this one called Eric. The original Eric the robot was created in 1928 for the Exhibition of the Society of Model Engineers, after the Duke of York cancelled his agreement to open the show. The story goes that Eric rose to his feet, bowed and gave a short speech. The robot was brought to the USA the year afterwards for a tour and vanished at some stage. The Eric on display here was a recreation of the original, funded by a Kickstarter campaign. Standing beside this pair was the Italian built Cygan. An 8 ft tall robot built in 1957 and which sold at auction for £17,500 in 2013.
Cygan, George and Eric
Onwards then to even more robots. It soon became clear that there have been people working in robotics for a long time, for all sorts of reasons. Some for very serious purposes such as surgery and prosthetics. Others so they knock out a few tunes on a trumpet. One interesting robot on display was an “open source” model which people can contribute to. While many of the robots were turned off and not doing anything (probably not practical to have them all operating at the time time, lest a robot apocalypse happened), seeing some in action was fascinating. The one I was particular taken with was Pepper the French robot who shakes people’s hands. Honda’s Asimo was there too, though on this occasion it wasn’t playing football, conducting an orchestra or dancing. Just think – if it had, they could’ve sold lots in the gift shop 😉 Then there was the robot which was designed to look like a real Japanese woman, a blobby one that looks like an escapee from a David Lynch film, one that acts and more than a few which track your eyes…
R.O.S.A. – Rob’s Open Source Android
Anyway, thumbs up from me for this one. It was great to see robots and automatons of all ages and to marvel at how these machines have evolved. I even brought home a cute little wooden robot of my own, which is standing on my desk as I type. I might just stop short of welcoming our robot overlords though…
Update: The exhibition is now immortalised on Google Streetview if you’re interested
To have a look at some of the photos I took, click on one of the thumbnails in the gallery below.
Leaves you in no doubt about what you’re going to see, does it?
Projection onto the carpet
Maillardet’s Automaton
One of the older exhibits
Insect automatons. Sort of
Don’t fall!
T-800 from Terminator Salvation
Doing some heavy lifting
Pepper the friendly French robot
Kodomodroid, a robuit built to look very human
ASIMO
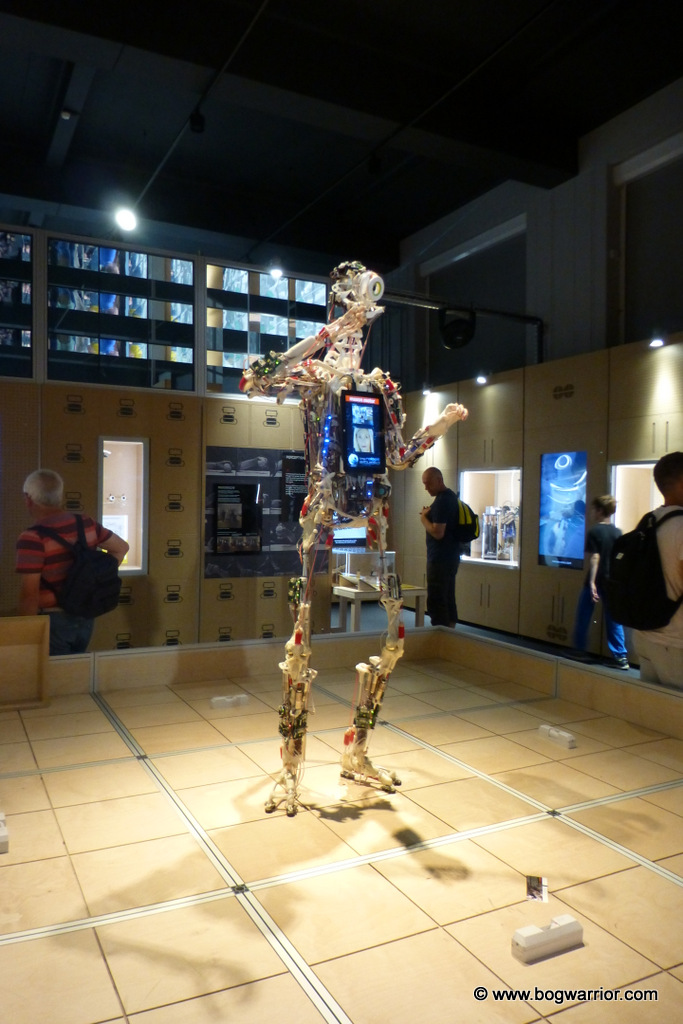
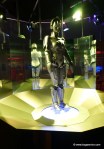
I for one welcome our robot overlords. Early REEM Prototypes.
The Raspberry Pi is a small, cheap and cheerful computer which was originally created to teach schoolchildren to learn how to write programming code. It is roughly the size of a pack of cards and has no hard disk or moving parts. Instead, it boots straight from a micro SD card on which software has been installed. Happily for those of us who are no longer at school and don’t want to do sensible things, it can be turned into a retro games console within a relatively short space of time. The success of the NES Classic Mini, which Nintendo never made enough copies of, shows that there is a lot of interest out there in retro gaming. Seeing as I spotted one of NES Classic Minis for sale the other day for €250, a “home made” version is a nice work-around. Not to mention it being a way to avoid rewarding the greedy gougers who bought those rare little consoles, simply to sell them on at grossly inflated prices. Grrr. Rant over.
Retropie is the software I will be using. For want of a better description, it’s a collection of emulators for various retro computers and consoles, all bundled into one user friendly system. The list of systems it emulates is quite extensive I’m not going to paste the whole lot into here or this page will go on forever. Let’s just say that if you can remember the panic over the Millennium Bug, the computer/console of your youth is likely to be included in Retropie. In theory, the older versions of the Pi (Models 1 & 2) will work with this but really, the newest model is the only game in town. It is much faster than its predecessors and comes with built-in wi-fi, bluetooth and four USB ports. For most people who’ve done any sort of messing around with computers at all, they will have most of the peripherals at home anyway. I set mine up on a computer running Windows 10 and it was a pretty straightforward process.
What you will need (hardware)
Raspberry Pi3, Model B. They can be bought in some shops (e.g. Maplin) but I rarely see them anywhere else. I bought mine online
Micro SD card. Minimum 4gb but but the bigger, the better. Yeah yeah, size matters and all that.
USB Keyboard
HDMI cable
Monitor or TV with HDMI port
USB joystick/gamepad
A Wi-Fi connection and your Wi-Fi password
What you will need (software) (All of these are free downloads)
*Ahem. This is where you move into that grey/illegal territory. All I’ll say is only download the games you originally owned back in the day. Or better still, make images of your original games which you still own.
Getting Started
Install the Win32 Disk Imager and the SD Card Formatter on your PC.
Unzip the Retropie file
Insert your Micro SD card into your computer.
Unplug any external USB storage devices from the computer (a precaution)
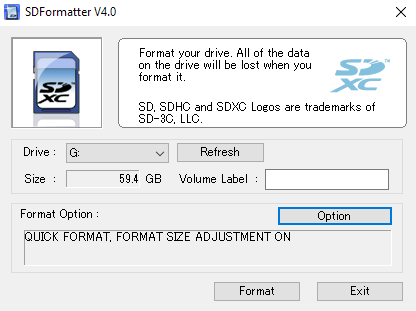
Formatting the SD card
When it comes to formatting the SD card, you can of course use the standard Windows formatting tool. However, it’s better practice to use the free SD formatting tool as supplied by the enigmatic sounding SD Association. It will give the memory card a more thorough formatting and will remove any partitions and modifications other devices may have made to it. Installing Retropie on the Micro SD Card
Open up the Win32 Disk Imager program. Select the unzipped Retropie disk image (it should have a .img extension)
Click the “Write” button. You will be given a warning which is nothing to worry about unless you’ve got something else apart from the memory card plugged into the computer… After a few minutes, the Win32 Disk Imager will finish installing Retropie onto the memory card. It is now bootable and ready to be popped into the Raspberry Pi.
Connect the Raspberry Pi’s power supply, keyboard, joypad and HDMI cable. Turn on Raspberry Pi and the TV/Monitor.
I’ve turned it on. What now?
Retropie menu
On boot-up, Retropie will ask to configure the buttons on your joystick/joypad. It’s fairly straightforward and if you mess it up, just plug out the power and restart it 😉 For this, I used an old joypad I’ve had for years and it worked fine. If you’ve got a spare Playstation, X-Box or Nintendo controller lying around, they will work too.
A configuration screen will appear next. Using the joypad, navigate to the very last item on the page – Wi-Fi. Select your Wi-Fi network, type in the password and reboot the Raspberry Pi.
Once the Raspberry Pi has been rebooted, bring up Windows Explorer. Type \retropie into the address bar. All going well, a screen like the one above will appear.
Open the Roms folder and you will see a long list of folders named after old computer systems contained within it. Simply copy the rom files for the games you wish to play into the folder of the computer/consoles they belonged to.
Restart the Raspberry Pi.
Failing miserably at Top Gear on the SNES
What you will notice when you reboot into RetroPie is that you can now see the system(s) which now have roms. You an easily choose the game you wish to play from the menu.
To exit from a game, press the Select and Start buttons simultaneously.
Depending on the size of the memory card you used for this, you could potentially load on a lot of retro games. I have not got around to testing them all out yet but to date it has been mostly good. The only console it has struggled to emulate has been the N64. Goldeneye runs with the speed of an arthritic snail on it. Other games were fine.
Some observations/notes (as much for myself as anyone else 😉 )
Where’s the sound?
I don’t know if this is an issue for other people but I could get no sound from my Raspberry Pi. To resolve it, I put the Micro SD card into the computer, opened up config.txt in Notepad and removed the # from in front of the hdmi_drive#2 text
Why aren’t all the supported computers and consoles on the main menu?
In order to keep the size of the original Retropie download down to a mere 600mb, it doesn’t bundle all of the systems on the original install file. The additional ones can be added later
I’m going to use a different emulator for the Amiga
I love the Commodore Amiga. I wrote my B.A. Thesis on an A600 back in the day – no wonder my eyesight’s gone to pot! My favourite Amiga emulator is Amibian so it merits a memory card all of its own 🙂
I am in the lucky position of having a spare laptop to play around with. It cost me 0c so I can’t quibble with the price. But I might as well give out about it anyway. Nothing screams “I will struggle to run Windows” like a laptop from 2010 (under)powered by a Celeron processor and 2GB of RAM. Having briefly dabbled with a version of Ubuntu running off a DVD a few years ago, I was curious to find out how it’d work installed properly on a computer. So I got downloading.
Which Version?
My desktop
This is where the fun starts. There seems to be an endless selection of Linux distributions (distros) out there. I don’t think I have enough years left on this planet to try them all so I tested a handful of the more popular ones. Even though all the Linux distros are quite alike, they have their own quirks. In the end I settled on Linux Mint. It runs very nicely on my creaking old laptop and has almost fooled me into thinking it’s a half decent machine. Also, because it is such a popular distro, there is plenty of help online for users. More on this later…
The Good
My Linux Mint desktop
On a superficial level, Linux Mint operates a lot like Windows. There’s still a Start button, menus, windows and plenty of familiar software. Skype, VLC Player, Firefox, Libre Office, Dropbox, Steam and Spotify are just a few. It also comes with quite a lot of open source and paid software written especially for the platform. There is also the option of installing and running some Windows programs using Wine . It works very successfully with some programs but can be problematic with others.
The enigmatically named Synaptic Package manager is Linux’s equivalent of the App Store familiar to smartphone users. It’s the simplest, most straightforward way of installing software.
The Bad
Just when everything seemed to be going so well.
Installing Linux Mint was painless but I ran into problems straight away because of the wireless card in the laptop. Of all the laptops in all the world, I had to own the model that had a card Linux doesn’t recognise 😦 It worked fine when connected to the router by an ethernet cable but who wants that when you have a laptop? To cut a long story short, I bought an inexpensive little USB Wi-Fi adaptor made by Plugable. I went with Plugable because they make devices which are compatible with Linux. Not all devices are. Once the adapter arrived, it plugged and played like a regular device.
The Ugly
The Terminal
I’ve done well to get this far without mentioning The Terminal. When I need to open this up, I know there is a chance my braincells will start to hurt. I’m still sorry I tried to install the Tunnelbear VPN on this. Basically, if you want to keep your sanity and enjoy using your perfectly nice, functioning new operating system, don’t try anything out of the ordinary. The Linux people on internet forums speak geek and it will melt your brain cells.
I mentioned at the top of this piece that I’d plumped for Linux Mint because it’s so popular. It’s easier to find answers to questions tailored to this operating system.
From my limited experimenting with it so far, peripherals such as printers and scanners may be troublesome. I shall update this post should I try to install any of these.
The conclusion….so far
I’ve no regrets about installing it on this laptop. If you have an old computer or laptop which isn’t being used, then, by all means, give it a go. Many distros of Linux, including Mint, come with the option of trying it without installing. I like Linux but I don’t love it. 20+ years of Windows has done the damage.
And finally
I stumbled across this very useful web page not long after I installed Linux Mint and followed the instructions.


 Click the “Write” button. You will be given a warning which is nothing to worry about unless you’ve got something else apart from the memory card plugged into the computer… After a few minutes, the Win32 Disk Imager will finish installing Retropie onto the memory card. It is now bootable and ready to be popped into the Raspberry Pi.
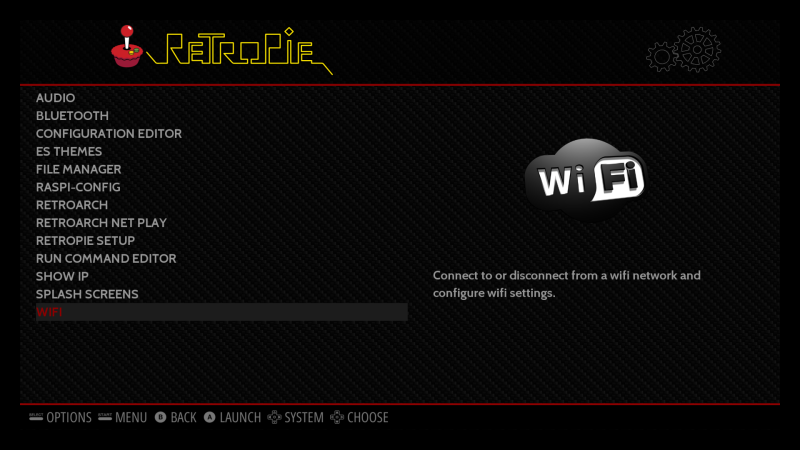
 Once the Raspberry Pi has been rebooted, bring up Windows Explorer. Type \retropie into the address bar. All going well, a screen like the one above will appear.


